
Protein Flapjack Recipe with Peanut Butter
By Michael
A protein flapjack that bakes like a flapjack — that is the brief for this recipe. Protein powder and peanut butter go into a proper oat bar, with the extra liquid the powder needs worked out in advance, so the bars come out chewy rather than dry and chalky. Most protein flapjacks fail at exactly that point; this one is built around avoiding it.
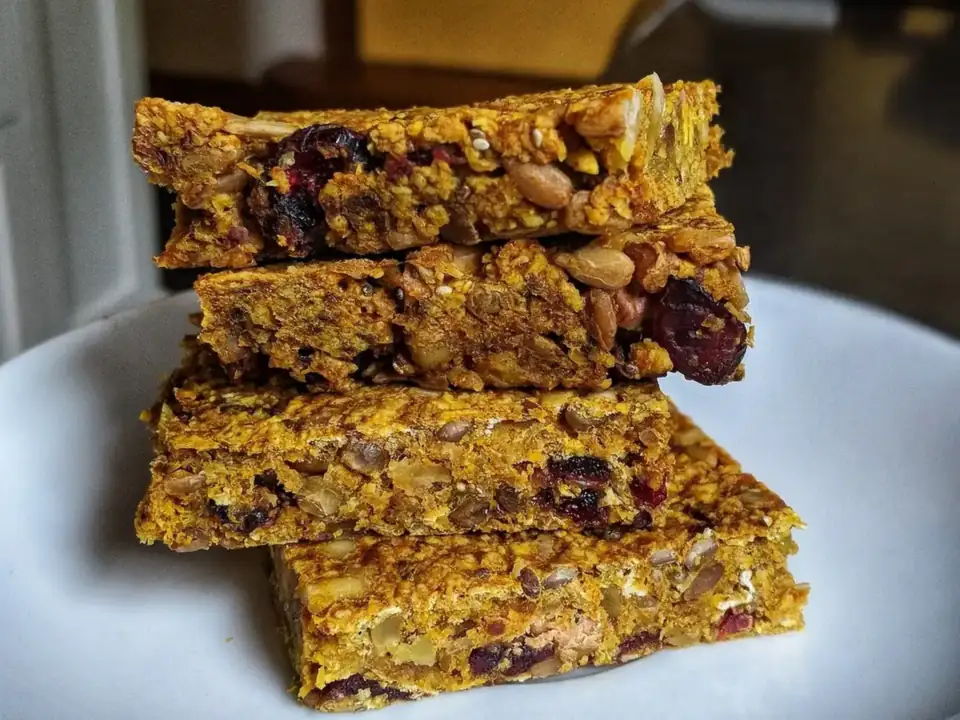
The protein flapjack recipe
- Prep: 10 min
- Cook: 18 min
- Total: 30 min
- Makes: 10 chunky bars
Oven: 170°C (150°C fan) / Gas Mark 3. You need a 20cm square tin, lined with baking paper.
Draft recipe: worked out from cross-checked published recipes and not yet kitchen-tested by us. Times are a guide — use the cues in each step.
Ingredients
Method, step by step
Heat the oven and line the tin. Heat the oven to 170°C (150°C fan / Gas Mark 3). Line a 20cm square tin with baking paper, leaving paper overhanging two sides. These bars are dense, and you will be glad of the handles when you lift the slab out.
Melt the peanut butter, honey and milk. Put the peanut butter, honey or syrup, and the milk in a large pan over a low heat. Stir until the peanut butter has melted into the liquid and the mixture is smooth and pourable. Do not let it boil. If it starts to catch on the base, take it off the heat — the residual warmth finishes the job.
Stir in the protein powder. Take the pan off the heat. Add the protein powder and stir until it has completely disappeared into the mixture with no dry pockets and no lumps. This order matters: powder stirred into the warm liquid hydrates evenly, while powder tipped onto dry oats stays in floury pockets that bake into chalky bites.
Add the oats. Stir in the oats, the salt and the chocolate chips, if you are using them, until every oat is coated. The mixture will be stiffer and drier-looking than a classic flapjack mix at this stage. That is expected — do not add more liquid unless there are visibly dry oats that will not coat, in which case add milk a tablespoon at a time.
Press into the tin, firmly. Spoon the mixture into the lined tin and press it down hard and evenly, right into the corners, with the back of a spoon or the base of a glass. Protein mixtures do not flow or settle the way buttery ones do; the surface you press is the surface you get. Take an extra minute here.
Bake, briefly. Bake for 15 to 18 minutes — deliberately shorter than a classic flapjack. Take the tin out when the edges are just turning golden and the centre still looks slightly soft and pale. Protein powder dries as it bakes, and every extra minute in the oven is chew lost. If the top looks dry and deeply golden, they have already gone a minute too far.
Cool in the tin, then cut thick. Leave the slab to cool in the tin for at least 30 minutes. It firms up as it cools, and cutting it warm gives rough, crumbly edges. Lift the slab out with the paper and cut into 10 chunky bars — two rows of five. Thicker bars stay moister than thin ones, which is why this recipe makes 10 rather than 12.
Why protein flapjacks go dry — and the three fixes
Protein powder is thirsty. Added to a flapjack mixture, it drinks the liquid that was meant for the oats, then keeps drying out in the oven. The result is the bar everyone recognises: dense, powdery, and hard work to eat. Shop-bought protein bars hide this with syrups and coatings. At home, you fix it with three levers, all of them built into the recipe above.
More liquid. The 100ml of milk is not in a classic flapjack, and it is here purely to feed the powder. Skip it and the mixture will not even coat the oats properly.
Enough fat. Peanut butter does double duty — protein and fat in one ingredient. The fat coats the oats and keeps the crumb tender. Cutting the peanut butter to make the bars leaner is the fastest route to a dry bar.
A shorter bake. Fifteen to eighteen minutes, out while the centre is still soft. A classic flapjack forgives an extra five minutes. A protein flapjack does not.
How much powder you use matters as much as any of these. This table shows what happens as the powder climbs, per 300g of oats:
| Protein powder per 300g oats | Texture result |
|---|---|
| 40g | Barely there. The bars bake almost like a classic flapjack — soft and easy — with a mild protein lift. |
| 60g (this recipe) | The balance point. Chewy bars that still eat like flapjacks, with the liquid and bake time adjusted to suit. |
| 90g | Firm and noticeably drier. Needs extra milk to work at all, and the powder flavour starts to lead. |
| 120g | Dry, dense and chalky unless you rebuild the recipe around it. This is where most homemade protein flapjacks fail. |
Whey or plant protein powder?
Both work in this recipe, but they do not behave identically, and the differences are worth knowing before you bake with an expensive tub.
| Whey powder | Plant powder (pea, soy or blends) | |
|---|---|---|
| Flavour in the bars | Mild and milky; vanilla whey disappears into the peanut butter | Earthier; some blends taste faintly of pea. Vanilla or chocolate versions hide it best |
| Texture | Sets a little firmer as it bakes; can turn rubbery if overbaked | Absorbs more liquid and sets softer; bars stay tender but can be fragile |
| Liquid needed | The 100ml milk in the recipe is about right | Often drinks a little more — add milk a tablespoon at a time if the mixture will not coat the oats |
| Best for | The closest thing to a classic flapjack bite | Vegan bars (with oat milk and syrup instead of honey) and anyone avoiding dairy |
Flavoured or unflavoured? Vanilla is the safe choice — it suits peanut butter and oats. Chocolate powder plus the optional chips makes a more dessert-like bar. Strong fruit flavours tend to fight with peanut butter and are better kept for shakes.
The no-bake version
If you would rather not use the oven, the same mixture presses and chills instead. Make it exactly as above, but warm the peanut butter mixture only enough to melt everything together, stir in the powder and oats, press firmly into the lined tin, then cover and chill for at least 2 hours until firm enough to cut.
Know the trade before you choose. No-bake bars are softer and fudgier, they need to live in the fridge, and they melt into a sticky handful in a warm gym bag. Baked bars keep at room temperature and travel properly. Our honest view: the baked version is the better bar, and the no-bake version is the better option only when the oven is genuinely unavailable. More unbaked and chilled ideas sit alongside the other versions on the flapjack variations page.
Protein numbers, honestly
You will notice this page gives no grams-of-protein-per-bar figure, although plenty of protein flapjack recipes lead with one. That is deliberate. A per-bar figure is only worth printing when it has been worked out from the actual ingredients in the final recipe — the protein content printed on your powder's label, the peanut butter's label, the oats, divided by the number of bars the batch really makes. Labels differ between brands, powders differ between whey and plant, and a number borrowed from somebody else's recipe would be a guess dressed as a fact.
So the method is here and the figure is not, yet. When this recipe has been kitchen-tested and the calculation done from the tested ingredients, the number will be added to this page, labelled as calculated, and never rounded up to look better. If you want to work out your own batch in the meantime, that is exactly the sum to do: total protein from every ingredient's label, divided by 10 bars.
One more honest point, because it matters more than the number: a protein flapjack is a snack with extra protein, not a health product. It still contains honey or syrup and peanut butter, and it is still energy-dense. That is fine — it is a flapjack. The healthy flapjack recipe is the page for lighter bars, and the classic flapjack recipe is there when you just want the real thing.
Keeping, and taking them to the gym
Store the bars in an airtight tin at room temperature and eat them within 5 days. They dry out faster than classic flapjacks — the powder keeps drinking moisture even after baking — so this is not a batch to bake for next week. Wrapping each bar individually slows the drying and makes them grab-and-go.
For a gym bag, wrap bars in foil or a reusable wrap rather than loose in the bag, and keep them out of a hot car or a bag left against a radiator; the peanut butter softens and the bars turn greasy in heat. They freeze well for up to a month as a guide — defrost one overnight in its wrapping and it is ready in the morning.
More training-friendly and everyday variations are gathered on the flapjack variations page, and common questions about every version are answered on our flapjack questions page.
Questions people ask
Yes. Unflavoured whey works well and lets the peanut butter lead. Unflavoured plant powders can taste earthy in a baked bar, so vanilla or chocolate plant powder is the safer choice there. If you use an unflavoured powder and the bars taste flat, half a teaspoon of vanilla extract in the melted mixture fixes most of it.
Three causes cover nearly every dry batch: too much powder for the oats, the milk left out or reduced, or a bake that ran long. Protein powder dries as it bakes, so take the bars out while the centre still looks slightly soft. If a batch is already dry, warm a bar for a few seconds before eating — it softens the texture considerably.
You can swap it, but do not simply leave it out — it provides the fat that keeps these bars tender as well as much of their protein. Another nut butter works at the same weight. Sunflower seed butter works for nut-free bars. Ordinary butter gives you a plainer protein flapjack that still bakes well, though the flavour and protein both drop a little.
Five days in an airtight tin at room temperature, wrapped individually if you can — protein powder keeps absorbing moisture after baking, so these dry out faster than classic flapjacks, which keep for a week or more. Freeze for up to a month as a guide and defrost bars as you need them.
No, and we would not claim otherwise. A protein flapjack is a filling snack with more protein than an ordinary flapjack — useful before or after training, or as a substantial snack between meals. It is not balanced like a meal, it contains honey or syrup, and it should sit alongside normal food rather than in place of it.
Yes, and freezing suits them well because their room-temperature life is short. Wrap each bar, freeze for up to a month as a guide, and defrost at room temperature for an hour or so — or overnight in its wrapping for the morning. The texture survives freezing better than it survives a week in a tin.